Supported devices: NETIO 4All, NETIO PowerPDU 4C, NETIO 4
Contents
- Creating a rule
- Creating a Lua script
- Using the log file
- Script triggering options
- Scheduler function
Creating a rule for Lua scripting
To create and run a Lua script, do the following:
1) In the Actions section of NETIO 4 power sockets web administration, click Create Rule to add a rule
2) Fill in the following parameters:
- Enabled: checked
- Name: Timed Blinker (user-defined)
- Description: Blinking with outlet 1 (user-defined)
- Trigger: System started up
- Schedule: any (does not affect the function in this configuration)
3) Copy the following code and paste it into the field for the Lua script:
------------Section 1------------
local output = 1 -- select output number (1 - 4)
local interval = 1 -- select the interval between switching (seconds)
local time1 = 23 -- start of inactivity xx:00 (0 - 24)
local time2 = 5 -- end of inactivity xx:00 (0 - 24)
---------End of Section 1---------

local state = 0

function switch()
  devices.system.SetOut{output=output, value=state}
  state = not state
  delay(interval,function() checkTime() end)
end

function checkTime()
  local currentTime = os.date("*t").hour
  if time1 <= time2 then
    if ((currentTime < time1) or (currentTime >= time2)) then
      switch()
    else
      delay(1,function() checkTime() end)
    end
  else
    if ((currentTime < time1) and (currentTime >= time2)) then
      switch()
    else
      delay(1,function() checkTime() end)
    end
  end
end

checkTime()
4) To finish the rule creation, click Create Rule at the bottom of the screen.
Creating a Lua script for NETIO smart power socket
- The script toggles the socket state, checks the time and stops the toggling during a specified time interval.
- The code will need some variables to set the needed parameters. There will be 4 variables in total (socket No., switching time, start and end of the inactivity interval).
- The code is divided into two functions. The checkTime function checks the time and determines whether or not to toggle the socket state. The switch* function actually switches the socket state.
- A function is declared by the function keyword, followed by the function name. The function is terminated by the end keyword.
Variables
- Variables are declared by the local keyword. We use the following variables: output, interval, time1, time2
- The variables have the following meanings:
-
output
- Sets the socket to flash.
- For example, to set the socket No. 2: output=2
-
interval
- Sets the time delay between changes in the socket state (in seconds).
- For example, to switch every 5 seconds: interval=5
-
time1
- Sets the start time of the inactivity interval (in hours).
- For example, to specify 22:00 (10 pm): time1=22
-
time2
- Sets the end time of the inactivity interval (in hours).
- For example, to specify 5:00 (am): time2=5
- These variables can be changed in the code header (Section 1) if needed.
- In addition, there is the state variable to keep track of the current state of the socket and toggle it accordingly. It is initially set to zero (local state = 0).
Switch function
function switch()
  devices.system.SetOut{output=output, value=state}
  state = not state
  delay(interval,function() checkTime() end)
end
- This function toggles the socket status, and then invokes the checkTime function after a delay specified by the interval variable to find out if the socket should be switched again.
- The socket state is changed using the following internal function**: devices.system.SetOut{output=output, value=state}
- The function has 2 parameters. The first parameter is the output (the socket). Its value is taken from the output variable using the output=output statement (the first “output” is the parameter name, the second is the variable). The second parameter is the value. Its value is taken from the state variable (value=state).
- After that, the function makes sure that the state is changed when it is called again. This is achieved by changing the value of the state variable from 0 to 1, or from 1 to 0.
- Negation is used to achieve this: state = not state
- Finally, the checkTime function is invoked after the specified delay. The delay internal function is used for that. Its first parameter is the delay, taken from the interval variable, and the second parameter is the function to execute, that is checkTime. The statement is: delay(interval,function() checkTime() end)
CheckTime function
function checkTime()
  currentTime = os.date("*t").hour
  if time1 <= time2 then
    if ((currentTime < time1) or (currentTime >= time2)) then
      switch()
    else
      delay(1,function() checkTime() end)
    end
  else
    if ((currentTime < time1) and (currentTime >= time2)) then
      switch()
    else
      delay(1,function() checkTime() end)
    end
  end
end
- The os.date() library function*** is used to get the current time. To make things easier, a new currentTime variable is introduced to store the current hour.
- This is the statement to create the variable and set its value: local currentTime = os.date("*t").hour
- Next, it is necessary to distinguish two cases: either the inactivity interval does not extend over midnight, e.g. it runs from 2:00 to 5:00 (the if section), or it does extend over midnight, e.g. it runs from 22:00 to 8:00 (the else section). The condition to distinguish these two cases simply compares the values of time1 and time2. Conditions, just like functions, need to be terminated with the end statement. The condition is as follows:
function checkTime()
  currentTime = os.date("*t").hour
  if time1 <= time2 then
    if ((currentTime < time1) or (currentTime >= time2)) then
      switch()
    else
      delay(1,function() checkTime() end)
    end
  else
    if ((currentTime < time1) and (currentTime >= time2)) then
      switch()
    else
      delay(1,function() checkTime() end)
    end
  end
end
-
First, let us look at the case when the interval does not include midnight (the if section).
- The socket is toggled if the current time lies within the specified interval. That is, whenever the current time is either less than the start of the interval (currentTime < time1) or the current time is greater than or equal to the end of the interval (currentTime >= time2). The complete condition is: ((currentTime < time1) or (currentTime >= time2)).
- If this condition is true, the switch function is called.
- If the condition is not satisfied, the checkTime function is invoked again after a small delay. The delay between successive invocations is set to 1 second. Again, the delay function is used for that purpose. The statement is as follows: delay(1,function() checkTime() end)
-
Now let us examine the situation where the interval includes midnight (the else section).
- The condition that determines whether the switch function runs is very similar to the condition in the previous section, except that both sub-conditions must be satisfied at the same time. Instead of the or keyword, they are joined with the and keyword. The complete condition is: ((currentTime < time1) and (currentTime >= time2))
- Otherwise, the else section looks the same as in the previous case, that is: delay(1,function() checkTime() end)
Running the script in NETIO inteligent power socket
- A single invocation of the checkTime function is needed to start the script. The function is invoked at the very end of the script: checkTime()
- The script is finished, and it starts running after it is saved and your device is restarted.
*Lua, unlike e.g. Java, does not have a switch statement, so there is no naming conflict.
**For more information about basic functions, see the wiki: https://wiki.netio-products.com/
***For more information about library functions, see: http://lua-users.org/wiki/
Using the log file of NETIO smart power socket
The logfile, accessible through the web administration, can be used to debug the script.
- The log and logf functions are used to write to the logfile.
- For example, a suitable use of the logfile in the above code would be to log a description of each action performed with the socket.
- To do that, modify the switch function to include a condition to decide what to write to the log according to the state variable, just before the socket state is actually changed.
- To log the values of variables (e.g. socket No.) in addition to pre-defined text, it is necessary to use the logf function and use the correct placeholder (%d for an integer, %s for a string etc.) for the value of the variable.
- For example, when state == 1, we can write to the log as follows: logf("Switching output %d on", output). For state == 0, the write would be: logf("Switching output %d off", output).
- The modified switch function then looks like this:
function checkTime()
  currentTime = os.date("*t").hour
  if time1 <= time2 then
    ---- if section ----
  else
    ---- else section ----
  end
end
Lua script triggering options
- NETIO offers several options for triggering the script.
- Schedule is always checked. Script is triggered when Schedule is active. When needed script triggered every time, choose Schedule Always.
System started up
- This setting starts the script whenever the NETIO device is powered up (it takes about a minute for the system to boot).
- The “System started up” setting is suitable for scripts that run continuously.
- A script with an endless loop will be started as soon as the NETIO smart sockets device starts, and can only be stopped by unchecking the Enabled checkbox in its settings and restarting the NETIO device.
DO state changed
- The script is started whenever the state of any socket changes (the socket is switched on or off).
- It does not matter what has caused the output state change (pressing a button at the device, action in the web interface, action in the mobile app, another Lua script, etc.), the script is started in all cases.
Schedule has started or stopped
- The script is activated at the beginning or end of a schedule.
- In this case, it is necessary to specify the Schedule to use.
System variables updated
- The script is activated whenever a system variable (voltage, current, power factor, consumption etc.) changes.
- Suitable for scripts that watch the consumption or the current flowing through the socket.
Incoming CGI request
- The script is started whenever the NETIO device receives a CGI request.
- The CGI requests take the following form: “NETIO_IP/event?”
- For example: “192.168.0.26/event?”
- Additional arguments can follow the question mark.
-
After sending the CGI request, a page with an OK appears (see the picture below):
- For more information about this method of running scripts, see NETIO AN04.
Scheduler function
The Scheduler function is available in all NETIO 4x products. The Scheduler switches individual sockets on or off (socket 1 in the picture) according to a time schedule.
- Each socket can be controlled by a different schedule.
- The editor in the web interface allows you to create a custom schedule.
- The Scheduler function only switches the socket on or off when the scheduled interval (green area) starts or ends. In the meanwhile, the socket can still be controlled by other methods (buttons / web / mobile app).
As the picture shows, the schedule is designed for longer time intervals (e.g. switching a socket on for the entire weekend, as shown in the picture). For faster changes, a Lua script can be used.
Supported FW versions:
3.0.0 and later (Firmware archive)
More about Lua:
https://wiki.netio-products.com
This Application Note is compatible with:
|
|
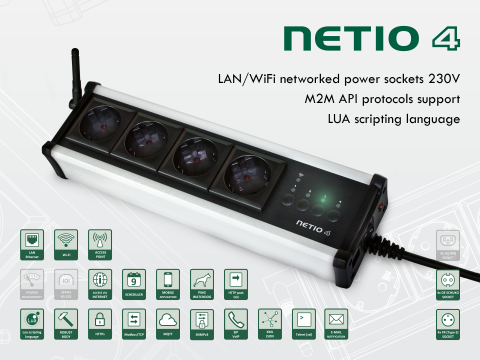
NETIO 4NETIO 4 is smart power socket (smart power strip) with four 230V/8A sockets, connected to LAN and WiFi. Each of the four power sockets can be individually switched on/off using various M2M API protocols. NETIO 4 is a unique product designed for IT, industry, smart homes, multimedia installations and other applications. Use the product whenever you need 230V sockets controlled by a mobile app, by a computer program (via M2M API) or by a custom script (Lua), and featuring a timer (Scheduler) or auto reboot functionality (IP WatchDog).
|
|
|
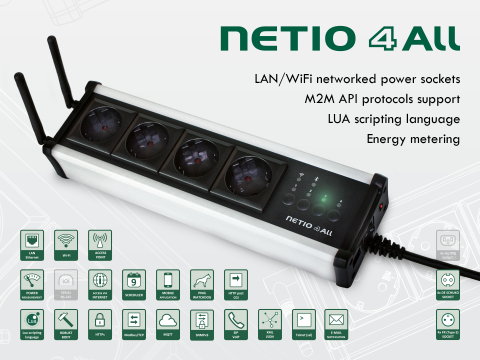
NETIO 4AllNETIO 4All is a PDU module featuring four 230V/8A power sockets with consumption metering for each socket as well as LAN and WiFi connectivity. Each of the four sockets can be individually switched on/off over the Web or using various M2M API protocols. Electricity consumption (A, W, kWh) can be measured at each power socket. NETIO 4All smart sockets are designed for remote measurement and control of electrical sockets. Use the product whenever you need 230V sockets controlled by a mobile app, by a computer program (via M2M API) or by a custom script (Lua) that runs directly in the NETIO 4All smart socket device. |
|
|
NETIO PowerPDU 4CNETIO PowerPDU 4C is a small 110/230V PDU (Power Distribution Unit). Each of the four IEC-320 C13 outlets can be independently controlled (On / Off / Reset / Toggle). Electrical parameters (A, W, kWh, TPF, V, Hz) are measured with high accuracy at each outlet. The device features two LAN ports (and a built-in Ethernet switch) for connecting to a LAN. Each power output supports ZCS (Zero Current Switching) to protect the connected equipment. |


